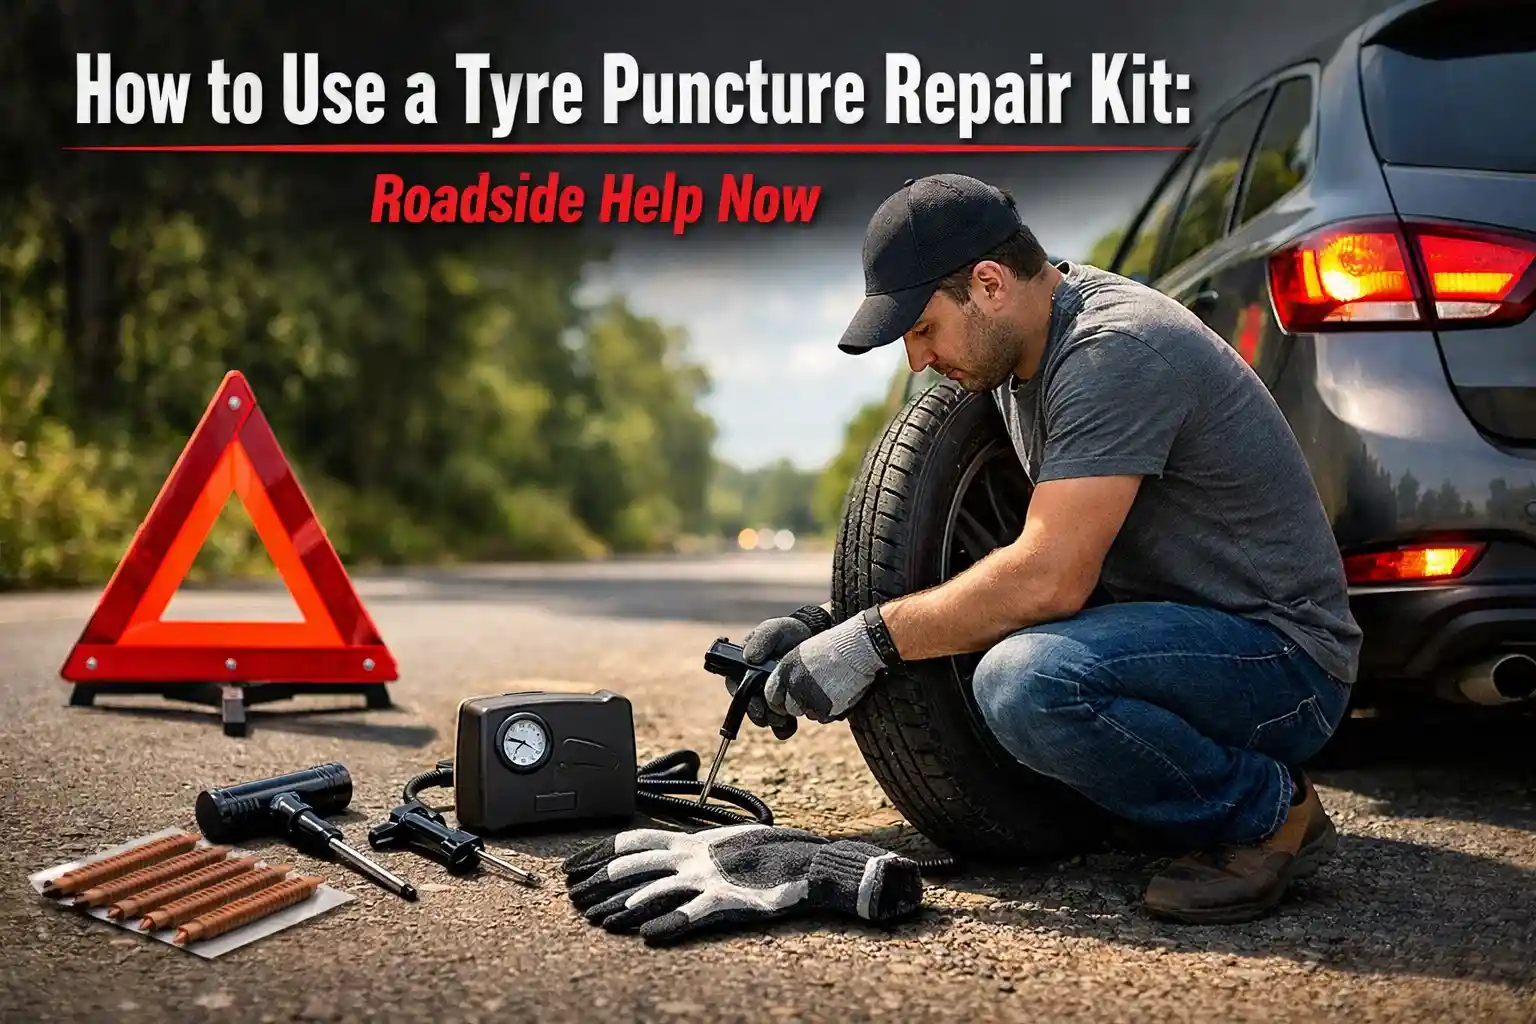
You’re driving down the highway, and suddenly you hear that dreaded thumping sound. Your steering wheel starts pulling to one side, and you notice your tyre pressure warning light glowing on the dashboard. You’ve got a flat tyre, and the nearest garage is miles away. Don’t panic! Knowing how to use a tyre puncture repair kit can save your day and get you back on the road safely. Every driver should understand the basics of emergency tyre repair. Whether you’re commuting to work, heading out on a road trip, or exploring off-road trails, a punctured tyre can happen anywhere, anytime. While it might seem scary at first, fixing a punctured tyre yourself is actually quite simple when you have the right tools and know the proper steps.
In this blog post, we will cover what’s in a repair kit, when to use it, safety tips, and step-by-step instructions for temporary roadside fixes until you reach a professional mechanic.
What is a Tyre Puncture Repair Kit?
A tyre puncture repair kit is your roadside emergency toolbox designed specifically for fixing small holes in tubeless tyres. Unlike the old days when every car carried a heavy spare tyre, modern vehicles often come equipped with these compact, lightweight kits that take up less space in your boot.
These kits serve one main purpose: to provide a temporary tyre fix that allows you to drive safely to the nearest garage or tyre service center. They’re not meant to replace professional repairs, but they’re incredibly valuable for roadside emergencies when you’re stuck with a puncture.
Types of Tyre Repair Kits
Not all tyre repair kits are the same. Here are the main types you’ll encounter:
Tubeless Tyre Repair Kit: This is the most common type for modern cars. It works specifically on tubeless tyres and usually contains rubber plugs or repair cords that you insert directly into the puncture hole.
Sealant Kit: These kits use a special tyre foam sealant that you inject into the tyre through the valve. The sealant coats the inside of the tyre and seals small punctures automatically. Some brands like the Slime Smart Tyre Repair Kit are particularly popular for this method.
Plug Kit: A tyre plug repair kit contains sticky rubber strips and an insertion tool that you use to physically plug the hole from the outside. These are great for slightly larger punctures.
Professional Roadside Kits: These are more comprehensive kits that might include multiple repair options, better quality tools, and additional safety equipment like warning triangles.
Compact Travel Kits: Perfect for motorcycles or cars with limited storage space, these contain just the essentials for quick tyre repair.
What’s Inside Your Repair Kit?
When you open a typical car tyre repair kit, you’ll find several important tools:
- Rubber plugs or repair cords: These are sticky strips that seal the puncture
- Reamer tool: Also called an insertion tool, this cleans and prepares the puncture hole
- Tyre sealant or adhesive: Helps the plug stick properly and creates an airtight seal
- Tyre pressure gauge: Essential for checking if you’ve inflated to the correct pressure
- Mini air pump or compressor: Usually connects to your car’s 12V cigarette lighter socket
- Gloves: Keep your hands clean during the repair
- Instruction manual: Step-by-step guidance specific to your kit
- Pliers: For removing nails, screws, or other objects causing the puncture
Some premium kits might also include tube cement, a blade for trimming excess cord, and even a safety cone or reflective vest.
When to Use a Tyre Puncture Repair Kit
Knowing when to use your repair kit is just as important as knowing how to use it. Let’s talk about the warning signs and situations where these kits come in handy.
Signs Your Tyre is Punctured
Your car will usually tell you something’s wrong before you even get out to check. Here are the common signs of a punctured tyre:
- Dashboard tyre pressure warning light illuminates
- Steering wheel vibration or unusual wobbling
- The car pulls to one side while driving straight
- A noticeable thumping sound from one of the tyres
- Visible loss of tyre pressure or a visibly deflated tyre
Perfect Situations for Using Your Kit
Your emergency tyre repair kit works best in these scenarios:
Roadside Emergencies: When you’re far from home or a garage and need to get moving safely. This is exactly when having a roadside tyre repair kit proves invaluable.
Small Punctures from Nails or Screws: If you’ve driven over a nail in tyre or screw, and the puncture is small (typically less than 4mm to 6mm in diameter), your kit can handle it.
Tubeless Tyre Repairs Only: Modern tubeless tyres are designed to work with these repair kits. They maintain their shape better and are easier to repair on the roadside.
Off-Road Adventures: If you enjoy exploring rough terrain, desert, or sand dunes, having a quality kit like the ARB Speedy Seal Mk2 can be a lifesaver when you’re miles from civilization.
When NOT to Use Your Repair Kit
Safety first! There are certain situations where attempting a DIY tyre repair could be dangerous:
Sidewall Damage: If the puncture is on the tyre sidewall (the side part of the tyre), don’t attempt a repair. The sidewall flexes constantly and repairs won’t hold safely.
Large Punctures: Holes bigger than 6mm are generally too large for temporary repairs. The puncture diameter limit exists for your safety.
Torn or Shredded Tyres: If your tyre has cracks, splits, cuts, or exposed steel belts, a simple plug won’t fix the structural damage.
Wheel Rim Damage: Sometimes the wheel itself is damaged. Your kit won’t help with this.
Multiple Punctures: If you have more than one hole, or if internal tyre damage is suspected, call for roadside assistance instead.
Bulging Sidewalls: This indicates serious structural damage, and the tyre should not be driven on.
Safety First Roadside Precautions
Before you even think about touching that punctured tyre, let’s talk about staying safe. Roadside tyre repair safety is absolutely critical because you’re working near moving traffic and dealing with a potentially unstable vehicle.
Finding a Safe Location
The first rule of roadside emergency management is getting your car to safety. Look for:
- Flat ground away from traffic flow
- A wide shoulder or emergency lane
- Well-lit areas if it’s dark
- Avoid steep inclines where the car might roll
- Distance from curves where other drivers might not see you
Once you’ve found your spot, park safely and engage your handbrake. Switch off the engine completely.
Make Yourself Visible
Other drivers need to see you clearly. Here’s what to do:
- Turn on your hazard warning lights immediately
- Place a warning triangle at least 45 feet behind your car
- If you have a reflective vest or jacket, wear it
- At night, use a flashlight or headlamp to see what you’re doing
Personal Safety Measures
Protect yourself during the repair:
- Wear gloves to keep your hands clean and protected from sharp objects
- Keep bystanders away from both your work area and traffic
- Never repair on steep inclines where the vehicle could shift
- Keep children and pets safely inside the car or well away from the road
- If the weather is dangerous (heavy rain, extreme heat, ice), consider calling for vehicle recovery instead
Pre-Repair Checks
Before starting your repair:
- Check your vehicle handbook for specific tyre information
- Locate your tyre handbook or check the door sill or fuel cap for recommended tyre pressure
- Ensure your tyre repair kit is complete, and tools are clean and dry
- Make sure you have good visibility and enough working space
Remember, if you feel unsafe at any point, it’s perfectly okay to call 24-hour tyre repair near me services or roadside tyre assistance. Your safety is more important than saving time or money.
Step-by-Step Guide to Using a Tyre Puncture Repair Kit
Now we’re getting to the heart of the matter. This detailed guide will walk you through every step of fixing a punctured tyre using your repair kit. Take your time, follow these tyre repair instructions carefully, and you’ll be back on the road before you know it.
1. Locate the Puncture
First, you need to find exactly where the air is escaping. Start by examining the tyre visually:
- Walk around your car and identify which tyre is flat
- Look carefully for obvious signs like a nail, screw, or piece of metal sticking out
- Check for cuts, tears, or bulges
- Listen for the hissing sound of escaping air
If you can’t see the puncture immediately, try this trick: mix a little water with soap (or use window cleaner if you have it) and spray it on the tyre surface. Look for bubbles forming – they’ll show you exactly where air is leaking.
Assess if the puncture is repairable: Check the size and location. Small holes in the tyre tread area are usually fixable. Damage to the sidewall or very large holes means you’ll need professional help instead.
2. Prepare the Tyre
Once you’ve located the problem, it’s time to prepare for the repair:
Position the puncture: If possible, rotate the tyre so the puncture is at the top. This makes it much easier to work with. You can do this by:
- Slowly rolling the car forward or backward
- Using your jack to lift the wheel slightly (though this isn’t always necessary)
Ensure tyre stability: Make sure your vehicle is stable. The tyre should have some air pressure still in it to maintain its shape. If it’s completely flat, you might need to add a little air first.
Gather your tools: Lay out everything you need from your kit:
- Reamer tool
- Insertion tool with a plug ready to go
- Lubricant (if your kit includes it)
- Pliers
- Gloves
3. Remove the Object Causing the Puncture
If there’s a nail, screw, or stick embedded in your tyre, you need to remove it carefully:
- Grip the object firmly with pliers
- Pull straight out without wiggling or twisting
- Be gentle to avoid making the hole bigger
- Keep the object if possible – it helps the mechanic understand what happened
Important note: Some tyre sealant kits actually recommend leaving the object in place. Always read the instructions for your specific kit first!
4. Clean and Enlarge the Puncture Hole
This step is crucial for a good seal. Use your reamer tool:
- Take the reamer (it looks like a rough file or rasp on a handle)
- Apply a little lubricant if your kit provides it
- Insert the reamer into the puncture hole
- Push and pull it in and out several times with a gentle twisting motion
- This cleans the hole, roughens the edges for better adhesion, and separates the steel belts inside the tyre
- Work it about 10-15 times until the reamer moves smoothly
The goal is to create a clean, slightly enlarged hole that’s ready to accept your plug. You’re essentially preparing the surface just like you’d sand wood before painting it.
5. Insert the Tyre Plug or Sealant
Now comes the actual repair. The method depends on whether you’re using a plug or a sealant:
For Tyre Plug/Cord Method:
- Thread a repair cord through the eye of your insertion tool (it should be centered, with equal lengths on both sides)
- Apply tube cement or adhesive to the cord if your kit includes it
- Smear lubricant on the insertion tool
- Push the insertion tool with the cord straight into the puncture hole
- You need to insert it firmly until only about 1-2 centimeters of the cord remains visible outside the tyre
- Now here’s the important part: pull the insertion tool straight out without twisting. Twisting can damage the plug or pull it back out
- The cord should stay in the hole with small portions sticking out on both sides
For Sealant Method:
- If using a sealant bottle, you might need to remove the valve core first (your kit will have a tool for this)
- Attach the sealant bottle directly to the tyre valve
- Squeeze the entire contents into the tyre
- Replace the valve core if you removed it
- Some kits have you attach the compressor to the sealant bottle
6. Re-inflate the Tyre
Your repair won’t work properly without the correct tyre pressure:
- Connect your mini air pump or compressor to the tyre valve
- If your compressor uses a 12V socket, plug it into your car’s cigarette lighter
- Turn the engine on if needed (some compressors require this for power)
- Inflate the tyre to the recommended tyre pressure found in your vehicle handbook, on the door sill, or near the fuel cap
- Use your tyre pressure gauge to check the pressure
- Don’t over-inflate or under-inflate both are dangerous
Pro tip: If you’ve used sealant and the tyre won’t inflate, try rolling the car forward a few meters. This helps spread the sealant inside the tyre to cover the puncture.
7. Check the Repair
You’re almost done, but don’t skip this verification step:
- Take a short test drive at low speed (around 10-20 mph) for just a few minutes
- This allows the plug to settle and the sealant to spread properly
- Pull over and check the tyre pressure again
- Inspect for any obvious leaks (you can use the soapy water trick again)
- Look at the plug to make sure it’s seated properly
- If using a plug, use your blade to trim the excess cord flush with the tyre surface
Listen carefully while driving. If you hear hissing or feel the car pulling, stop and reassess.
8. Understand This is Temporary
This is critical to remember: you’ve created a temporary repair, not a permanent fix. Here’s what that means:
Speed Restrictions: Most repairs require you to drive carefully and stay below 50 mph (or whatever your kit manufacturer recommends). This isn’t the time for highway racing!
Limited Distance: Don’t plan a cross-country road trip on a repaired tyre. Head straight to a garage for professional inspection.
Get Professional Help Soon: Visit Fast Grip Mobile Tyres or your nearest tyre service center as soon as possible. They can properly assess whether your tyre can be permanently repaired or needs replacement.
Replacement Timeline: Most temporary fixes should be professionally addressed within 24-48 hours or 100 miles, whichever comes first.
The internal tyre damage might be worse than what’s visible from outside, which is why professional inspection is essential.
Tubeless Tyre Repair Kit Special Instructions
Tubeless tyre repair kits deserve special attention because they’re the most common type you’ll use on modern vehicles. Let’s dive deeper into the specific techniques for these kits.
Understanding Tubeless Tyres
Tubeless tyres are designed differently from older tube tyres. They don’t have an inner tube; instead, the tyre itself creates an airtight seal with the wheel rim. This design actually makes them easier to repair temporarily because small punctures don’t immediately cause total air loss.
The Tubeless Repair Process
Here’s the detailed process specifically for tubeless tyre plug kits:
Step 1 – Remove the Puncturing Object: Use your pliers to carefully extract the screw, nail, or whatever caused the puncture. Pull straight out to minimize additional damage to the tyre.
Step 2 – Ream the Hole: Take your reamer tool and work it into the puncture:
- Insert it fully into the hole
- Pull it in and out with a twisting motion
- Do this 10-15 times
- You’re cleaning the hole, enlarging it slightly, and separating the steel belts to create space for the plug
- The hole should feel smooth when you’re done
Step 3 – Prepare Your Repair Cord:
- Select a sticky rubber strip or repair cord from your kit
- Thread it through your cord-insertion tool so it’s centered
- The cord should stick out equally on both sides
- Apply lubricant to make insertion easier
Step 4 – Insert the Plug:
- Push the insertion tool with the cord straight into the prepared hole
- Use firm, steady pressure
- Insert it until only about ½ to 1 inch of cord remains outside the tyre
- This ensures the plug goes deep enough to seal properly
Step 5 – Extract the Tool:
- This is the tricky part: pull the insertion tool straight out quickly
- Do NOT twist the handle
- The cord should remain in the hole while the tool comes out
- If done correctly, you’ll see the cord sticking out on both sides of the puncture
Step 6 – Trim and Finish:
- Use the blade from your kit to cut the excess cord
- Trim it flush with the tyre tread, leaving just a tiny bit exposed
- Don’t cut it too short leave about 1-2mm above the surface
Step 7 – Reinflate Carefully:
- Connect your pump and inflate to the recommended pressure
- Check with your gauge to ensure accuracy
- Inspect the repair one final time
Important Tubeless Tyre Reminders
- These repairs work best on tread punctures only
- The quality of your kit significantly affects success. Cheaper kits might have plugs that don’t seal as well
- Always carry a backup plan, like a mobile tyre repair service contact number
- Check the repair after driving the first few miles
Common Mistakes to Avoid
Even with the best instructions, it’s easy to make mistakes during DIY tyre repair. Let’s talk about the most common errors so you can avoid them.
Attempting Impossible Repairs
The biggest mistake is trying to fix damage that’s beyond a repair kit’s capabilities:
- Don’t repair sidewall damage: The sidewall flexes too much, and plugs won’t hold
- Don’t fix large punctures: If the hole is bigger than 6mm, call for help
- Don’t ignore structural damage: Bulges, cracks, splits, or exposed belts mean the tyre is unsafe
Inflation Errors
Getting the air pressure wrong is surprisingly common:
- Over-inflating: Too much pressure can cause the plug to blow out or damage the tyre further. Always use a tyre pressure gauge and follow handbook recommendations.
- Under-inflating: Too little pressure means poor performance, bad fuel economy, and potential tyre damage. You might think you’re being cautious, but it’s actually dangerous.
- Not checking pressure after repair: Always verify the pressure after your test drive
Skipping Safety Steps
In the rush to get moving, people often forget crucial safety measures:
- Not using hazard lights – other drivers need to see you
- Forgetting the warning triangle – this could prevent an accident
- Working too close to traffic – always get as far from moving vehicles as possible
- Not wearing gloves – you can get cut or burned by hot components
Improper Plug Insertion
Technical mistakes during the repair itself:
- Twisting the insertion tool when removing it – this can pull the plug back out
- Not inserting the plug deep enough – it won’t seal properly
- Failing to clean the puncture hole adequately – the plug won’t adhere
- Skipping the lubricant makes insertion harder and can damage the plug
Driving Too Aggressively After Repair
Your tyre has a temporary fix, not a complete healing:
- Don’t exceed 50 mph (or your kit’s specified limit)
- Avoid long-distance driving until professionally repaired
- No hard cornering or aggressive maneuvers
- Don’t delay the visit to a professional get it checked within a day or two
Ignoring Warning Signs
Pay attention to your car’s signals:
- Tyre pressure warning light stays on there might still be a leak
- Unusual vibration or pulling the repair might not be holding
- Continued loss of pressure you might have multiple punctures or the seal isn’t working
Preventive Tips to Reduce Punctures
The best repair is the one you never have to make! Here are practical ways to minimize your chances of getting a flat tyre.
Maintain Correct Tyre Pressure
This is the single most important thing you can do:
- Check your tyre pressure at least once a month
- Use a reliable tyre pressure gauge
- Check when tyres are cold (before driving or at least 3 hours after)
- Follow your vehicle’s recommended tyre pressure specifications
- Under-inflated tyres flex more, generating heat and making punctures more likely
- Over-inflated tyres are more susceptible to impact damage
Regular Tyre Inspections
Make it a habit to look at your tyres regularly:
- Check tyre tread depth monthly using a tread depth gauge
- Look for embedded objects like nails or screws before they cause problems
- Inspect for cracks, splits, or cuts in the rubber
- Check for uneven wear patterns that might indicate alignment issues
- Look for bulges or deformations in the sidewall
Avoid Overloading Your Vehicle
Every vehicle has a weight limit:
- Don’t exceed your car’s maximum load capacity
- Vehicle overloading puts excessive pressure on tyres
- Extra weight causes more wear and makes punctures more likely
- Check your vehicle handbook for weight limits
Drive Carefully and Defensively
Your driving style matters:
- Avoid potholes whenever safely possible
- Slow down for road debris rather than swerving dangerously
- Be extra cautious in construction zones
- Watch for broken glass, metal scraps, and sharp objects
- When off-roading, choose your path carefully to avoid sharp rocks or thorny vegetation
Seasonal and Environmental Considerations
Different conditions require different attention:
- In desert areas or dunes, be aware that extreme heat can increase puncture risk
- During winter, cold temperatures can affect tyre pressure
- After rough terrain driving, always inspect your tyres
- Following storms or high winds, be alert for road debris
Keep Your Repair Kit Ready
Maintenance extends to your emergency equipment:
- Inspect your kit every few months
- Ensure all tools are present and in good condition
- Check that sealants haven’t expired
- Keep plugs clean and dry in their packaging
- Replace any used items immediately
- Store your kit in an accessible location in your boot
Know Your Routes
Planning helps prevention:
- For long journeys, check your tyres before departing
- Research your route – some roads are more hazardous than others
- Keep a replacement tyre or quality spare if you frequently drive in remote areas
- Have contact information for roadside mobile tyre mechanics in your phone
Best Tyre Puncture Repair Kits (Brands & Recommendations)
Not all tyre repair kits are created equal. Here’s what to look for and some trusted brands to consider.
What Makes a Good Repair Kit?
Before we look at specific brands, understand what separates excellent kits from mediocre ones:
Comprehensive Tool Set: The best kits include everything you need reamer, an insertion tool, multiple plugs, adhesive, a pressure gauge, and a reliable inflator.
Quality Materials: Premium kits use high-quality rubber compounds that seal better and last longer. Cheap plugs might not hold under pressure.
Clear Instructions: A good instruction manual with diagrams makes the difference between success and frustration.
Durability: Tools should be sturdy metal, not flimsy plastic that breaks during use.
Portability: Compact travel kits are great, but make sure compactness doesn’t sacrifice essential tools.
Tubeless Compatibility: Ensure your kit is designed for tubeless tyres if that’s what your car uses.
Recommended Brands and Kits
ARB Speedy Seal Mk2: This professional roadside kit is popular among off-road enthusiasts. It’s particularly effective for desert and rough terrain adventures. The kit includes high-quality tools and multiple plugs. It’s a bit pricier but extremely reliable.
Slime Smart Tyre Repair Kit: One of the most recognized names in tyre repair. The Slime kit is known for being TPMS safe (won’t damage your tyre pressure monitoring sensors) and uses sealant that’s easily washed out later. Great for quick roadside emergencies.
Michelin Kits: Michelin offers both sealant kits and plug kits. Their products are well-designed, reliable, and come with excellent instructions. Mid-range pricing with professional-quality results.
Goodyear Repair Solutions: Goodyear makes both budget-friendly and premium options. Their multi-car kits work on various vehicle types and include good-quality inflators.
Budget-Friendly Options: For occasional use, many automotive stores offer basic compact travel kits for under £20. These work fine for simple punctures but might lack durability for repeated use.
Choosing the Right Kit for You
Consider these factors:
Frequency of Use: Regular commuters might want a premium kit, while occasional drivers could opt for a basic budget kit.
Type of Driving: If you do off-roading or frequently drive in remote areas, invest in a professional kit like the ARB Speedy Seal.
Vehicle Type: Some kits are designed for specific vehicle sizes. Larger SUVs might need different equipment than compact cars.
Storage Space: Compact kits fit in smaller boots but might have fewer features.
Skill Level: Beginners might prefer sealant kits as they’re generally easier to use than plug kits.
Roadside Assistance & Mobile Tyre Repair Options
Sometimes, despite your best efforts, you need professional help. Understanding your options for roadside tyre assistance is essential.
When to Call for Help
You should definitely contact professional roadside help if:
- The puncture is on the sidewall or is too large to repair
- You have multiple punctures
- You feel unsafe attempting the repair yourself
- The weather is dangerous (heavy rain, snow, extreme heat)
- You’re on a busy highway or dangerous location
- Your repair attempt didn’t work
- You lack the proper tools, or your kit is incomplete
Mobile Tyre Repair Services
Mobile tyre repair has become increasingly popular and convenient. Many services now offer 24-hour roadside assistance, bringing professional tyre repair directly to your location whenever you need it.
How It Works: You call or book online, provide your location, and a mobile tyre mechanic comes to you with all necessary equipment. They can often provide permanent repairs right on the spot.
Advantages:
- No need to drive on a damaged tyre
- Professional assessment of the damage
- Same-day tyre fitting is often available
- They bring replacement tyres if needed
- Safer than attempting roadside repairs yourself in dangerous locations
Services Offered: Most mobile tyre service providers offer:
- Puncture repairs
- Tyre replacement
- Tyre rotation
- Pressure checks
- Wheel balancing
Breakdown Recovery Services
Consider joining a breakdown service or vehicle recovery plan:
- Many organizations offer comprehensive roadside assistance
- Coverage often includes tyre changes, battery jump starts, and fuel delivery
- Some services provide 10-mile garage assistance or towing
- Annual membership can be cost-effective if you drive frequently
- Look for plans covering both UK and European travel
Booking Professional Services
Many companies now offer convenient online booking:
- Visit the websites of major tyre service centers
- Book puncture repair online with a few clicks
- Many offer same-day tyre fitting appointments
- Mobile services often arrive within 1-2 hours
- Compare prices and services before committing
Cost Considerations
Understanding the costs helps you budget:
- DIY repair kit: £10-£50 one-time purchase
- Mobile puncture repair: £40-£80 typically
- Garage repair: £20-£40 usually
- Tyre replacement: £50-£200+ depending on tyre quality
- Breakdown recovery membership: £50-£200 annually
Conclusion
Knowing how to use a tyre puncture repair kit is an essential skill for every driver. These kits provide a temporary fix to get you safely to professional help. Always prioritize roadside safety, follow step-by-step instructions, and respect the kit’s limitations to avoid sidewall or large puncture repairs.
Maintain correct tyre pressure, check tyre tread regularly, and keep a quality repair kit in your car at all times. Whether you DIY or call mobile tyre repair services like Fast Grip Mobile Tyres, being prepared ensures you’ll be back on the road safely and quickly.
For reliable and professional tyre solutions, including mobile tyre fitting, tyre replacement, and puncture repair, trust Fast Grip Mobile Tyres to get you safely back on the road. Contact us today to schedule your service.
Frequently Asked Questions
1. What is a tyre puncture repair kit used for?
A tyre puncture repair kit is a temporary roadside fix for small tyre holes, helping you reach a garage safely without a spare tyre.
2. Can a tyre puncture repair kit fix all types of punctures?
No, it works only on small tread punctures (usually ≤4–6mm) and is not suitable for sidewall or major tyre damage.
3. How long does a temporary tyre repair last?
Temporary repairs are meant to last only until you reach professional help, typically within 24–48 hours or 100 miles.
4. Is it safe to drive fast after a tyre plug repair?
No, keep your speed low (usually under 50 mph or per manufacturer guidance) until the tyre is permanently repaired.
5. Can I use a tyre repair kit on tubed tyres?
Most kits are designed for tubeless tyres; tubed tyres usually require different repair methods or a spare tyre.
6. Do I need a compressor to use a tyre puncture repair kit?
Yes, a small air pump or compressor is needed to re‑inflate the tyre to the correct pressure after repair.
7. Will a tyre repair kit damage my TPMS sensors?
High‑quality kits designed for modern cars are typically TPMS safe and do not affect your tyre pressure sensors.
8. How do I know if my puncture is repairable?
Check the size and location of the hole. Small tread punctures are repairable, but sidewall or large holes are not.
9. Can I reuse a tyre plug after removing it?
No, once a plug has been used, it should not be reused; always use a new plug for a secure seal.
10. What safety precautions should I take while using a repair kit?
Always park in a safe location, use hazard lights, wear gloves, and keep bystanders away from traffic while repairing.